Cook, Learn, and Share to Fight Hunger.
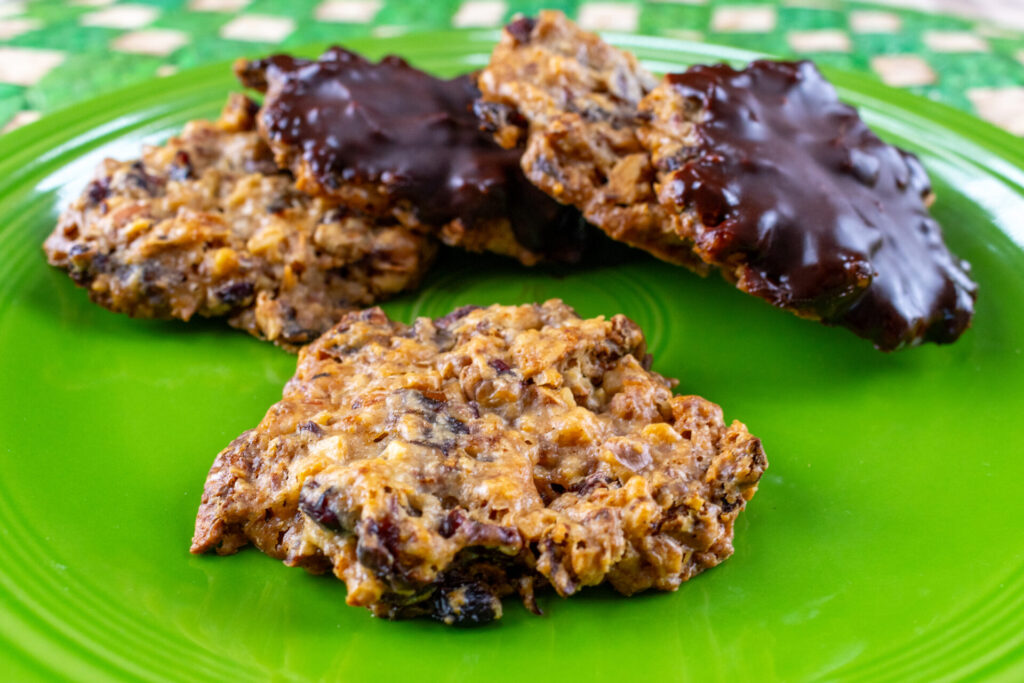
Moroccan Cookies Marokánky, half chocolate coated, half not, on the green plan, close up from the side -details
  • 30 min.
  • 30 min.
  • 2/5

Ingredients:

Moroccan Cookies Marokanky:

Optional Chocolate Coating:

* Use whole or part of the nuts, do not use graded nuts. Use any nuts you like. I prefer to use walnuts, pecan, or hazelnuts. You can also use a nuts combination. You can use roasted nuts or not roasted. Preferably use not salted version, but in will work with the salted version too.

Directions:

1. Preheat Oven:

1.1.

Set oven to preheat 350°F.

2. Nuts Preparation:

Begin preparing Moroccan Cookies Marokánky by readying the nuts.

2.1. Place on a cutting board:

1 ½ cups of nuts

And using a chef’s knife, cut into small pieces (similar to the size of the fruit – ¼”)

3. Dough Base for Moroccan Cookies Marokánky:

3.1. Place into a saucepan on medium heat:

½ cup of heavy cream
3 TBSP of butter

And let butter fully melt with occasional stirring with a whisk.

3.2. Add:

½ cup of all-purpose flour
½ cup of granulated sugar

And cook until it thickens while constantly stirring with a whisk (about 1 – 2) minutes.

3.3. Then add:

Nuts prepared in step 2
1 cup of candied fruit

And thoroughly stir using a spatula.

3.4.

Remove from the burner for the next step.

4. Form Moroccan Cookies Marokánky:

4.1. Using a 1 OZ disher or a set of spoons with scale, place the dough portion on baking sheets with parchment paper. Leave at least a 2” space between each.

Note: With a 1 OZ disher, you should be able to create about 16 cookies that should comfortably fit on two baking sheets.

4.2. Then using two small coffee spoons, gently flatten the cookie.

Notes:

  • Try to reach a unified thickness of about ½”.
  • The cookies will look rustic but if you want, you can spend extra time making them round.

5. Baking:

5.1. Bake in a preheated oven until fully baked (about 15 – 20 minutes).

Notes:

  • Rotate the baking sheets in the middle of baking.
  • When done, the cookies will still be very soft, but the sugar will lightly caramelize (while the color usually does not change).
  • If you are unsure if your cookies are fully done, bake them for about 20 minutes – they may end up slightly crunchier, but they will still be delicious!

5.2. Let fully cool on the baking sheet before further manipulation.

Note:
When the baking sheet cools down to room temperature, your cookies will get the correct hardness (sometimes, it could happened faster).

6. Optional Chocolate Coating:

Note: Coating is thoroughly optional. Some people prefer to coat the entire top of the cookie, some prefer half-dipped, some prefer to skip coating, and some do a mixture. If you do not have a preference, make a combination!

6.1. Prepare ½ of the recipe for the chocolate coating (here) and then dip the top part of each cookie while holding around the edges — (try not to dip your fingers in it :) or dip one half of the cookie (while holding the other half).

Full recipe for the chocolate coating here.

6.2.

Let the dipped cookies rest in the refrigerator for at least 15 minutes before serving.

Chocolate coating or dipping is a very fun process. If you follow a few simple rules, you will succeed. In this section we will be looking at techniques for coating a cake or dipping fruit or cookies into the chocolate.

Chef Tom Chef Tom Founder

7. Store Moroccan Cookies Marokánky:

7.1.

Dipped or partially dipped cookies are best stored in the refrigerator.

7.2.

Non-dipped versions can be stored in the pantry in a closed cookie jar.

About the Author:
Chef TomFounder
# 1
  • Published Recipes: 251
  • Av. Recipe Evaluation:
  • Location: Iowa, USA
  • Member since: 2023-02-02

Add My Review

If you want to add your review, you must log in.

Disclaimer

All content and information (including recipes, articles, and other materials) on CookingHub.com are the opinions of the authors and are not intended to provide dietary, medical, legal, or political advice. Consult with a professional before deciding to follow these opinions.

Authors and www.CookingHub.com (operated by CookingHub Foundation) are not responsible for any part of any possible outcome or its consequences, which include (but are not limited to):

  • Any health risk related to the handling of food, food quality, and/or not following USDA recommendations (including minimum safe serving temperatures and other guidelines).
  • Safety during preparation, including the handling of equipment and the equipment’s suitability for food preparation.
  • Improper performance of cooking techniques.
  • Sourcing of ingredients, providing tools, equipment, and anything else related to the preparation and consumption of the products of this recipe.
  • Nutritional data and information and diet-related information (and their accuracy). It is important to consult with your medical provider to ensure that the diet you are considering is suitable for you and to verify the information provided before proceeding.
  • The overall outcome of following recipes, including the look and taste of the final product.
  • Possible errors in articles and recipes (including incorrectly or unclearly explained steps and directions).
  • Typos.

All readers (users and visitors of www.CookingHub.com) are responsible for evaluating the recipes and articles and making their own decisions about whether to follow the steps and recommendations. They must ensure that the ingredients and steps fit with their dietary restrictions and avoid preparation methods that could pose a health risk due to an unsuitable diet.