Cook, Learn, and Share to Fight Hunger.
  • 45m
  • 2h 30m
  • 1/5

Ingredients:

Leaven:

Dough:

Brushing Mixture:

Vanilla Pudding:

Directions:

1. Leaven:

1.1. Place into a medium mixing bowl:

¼ cup of lukewarm milk
1 TSP of confectioners’ sugar
2 TSP of active dry yeasts
¼ cup of bread flour

Thoroughly stir with a whisk until fully combined (about 1 – 2 minutes).

1.2.

Cover with plastic wrap or plate.

1.3.

Set aside until it doubles in volume (about 20 – 30 minutes).

Buchticky s kremem - Little buns with Vanilla Cream - steps-1Buchticky s kremem - Little buns with Vanilla Cream - steps-2

2. Dough:

2.1. Place into a kitchen mixer with a whisk attachment:

1 egg
½ cup of granulated sugar

Whisk on high speed until fully incorporated and a creamy texture is reached (about 2 minutes).

2.2. Add:

½ stick of very soft butter

Whisk on high speed until fully incorporated—the butter is fully incorporated, and a creamy texture is reached again (about 2- 4 minutes).

2.3. Add:

Leaven prepared in step 1

Whisk on high speed until fully incorporated.

2.4. Replace the whisk attachment with a hook attachment and add:

2 cups of bread flour
¼ TSP of salt
½ TSP of vanilla extract
¼ cup of lukewarm milk

Knead on slow speed until all ingredients are partially combined.

2.5. Then increase the speed to medium-high and knead until nicely combined (about 1- 2 minutes).

Note:
The final dough is slightly sticky and can partially stick to the bottom of the bowl. Use a bowl scraper to release it from the hook and the bottom of the bowl.

3. Rising the Dough:

3.1.

Remove the mixing bowl from the mixer and cover with plastic wrap or a plate.

3.2.

Let it rise in a warm place until it has about doubled in size – it doesn’t need to be exactly doubled (about 2 – 3 hours).

4. Brushing mixture:

4.1.

Prepare a brushing mixture by briefly hand whisking 1 egg with ¼ cup of milk in a small mixing bowl.

5. Buchticky Forming:

Note:

  • Work on a surface that is not floured.
  • If the dough is too sticky after rising, add extra flour.

5.1.

Separate the dough into a few large pieces.

5.2.

Roll each piece into ½ – ¾” strings.

5.3.

Cut strings into ½ to ¾” long segments.

5.4. Using both hands’ palms, roll each segment shortly into a round ball and place it on a baking sheet.

Important:
Make sure that the buchticky are touching each other, but do not press them as close as possible. They will expand in further proofing and baking and grow to the height and width, which will create nicely connected buchticky (little buns) that we will separate before plating and serving.

5.6.

When all done, brush with about half of the brushing mixture (the other half will be used right before baking).

6. Proofing:

6.1.

Let the formed buchticky proof in a warm place for about 30 minutes.

7. Baking:

7.1.

Set oven to 350°F.

7.2.

Gently brush all the buchticky with the brushing mixture again.

7.3.

Bake in a preheated oven until they turn golden (about 15 – 20 minutes).

7.4.

Remove from the oven and let partially cool before serving (just enough to be able to touch them with your hand).

Buchticky s kremem - Little buns with Vanilla Cream - steps-8

8. Vanilla Pudding:

8.1. While buchticky are baking, prepare vanilla pudding by placing it into a small saucepan on medium-high heat:

1 ¼ cup of milk (part of the total amount.

Bring to a simmer (light boil) with occasional stirring.

8.2. Meanwhile, place into a small mixing bowl:

½ cup of milk (the remaining amount)
2 egg yolks
½ cup of confectioners’ sugar
¼ cup of all-purpose flour

Thoroughly stir with a whisk until fully combined (about 30 seconds to 1 minute).

8.3.

When the milk reaches a light simmer, lower the heat to medium and let the mixture from the mixing bowl slowly drizzle into the milk while vigorously stirring.

8.4.

Then cook with constant stirring until it thickens to a thick pudding texture (about 30 seconds to 1 minute).

8.5. Take the saucepan from the burner and add:

1 TSP of Vanilla Extract

Stir until it gets fully incorporated.

9. Plating:

9.1. Place warm buchticky on individual plates (about 15 – 20 per portion for the main course).

Tip:
If the Buchticky has cooled, you can reheat it in the microwave shortly. The same can be done for leftovers (store the Buchticky and cream separately).

9.2.

Pour vanilla pudding over buchticky on the plates (be generous)!

Embark on a Culinary Adventure with Little Buns with Vanilla Pudding (Buchticky s Krémem)!

Read more

Prepare to be swept away on a delicious journey to the heart of Czech and Slovak cuisine! Today, we’re diving headfirst into a beloved classic: Little Buns with Vanilla Pudding (Buchticky s Krémem). This isn’t just any dessert; it’s a culinary tradition, a nostalgic favorite, and a guaranteed way to satisfy your sweet cravings.

Imagine sinking your teeth into a cloud of fluffy, golden-brown buns, each one generously bathed in a velvety smooth vanilla pudding. It’s the kind of dish that transports you back to childhood, evoking memories of warm kitchens and happy gatherings. In the Czech and Slovak Republics, these delightful buns aren’t confined to the dessert table. Oh no, they’re often enjoyed as a sweet main course, a delightful departure from the ordinary.

Why You Need These Little Buns in Your Life:

  • They’re a Taste of History: Little Buns with Vanilla Pudding have been gracing tables for generations, carrying with them the warmth and comfort of Czech and Slovak heritage. Each bite is a taste of tradition, a connection to a rich culinary past.
  • They’re Unexpectedly Versatile: While undeniably delicious on their own, these buns are also incredibly adaptable. Feeling adventurous? Try adding a sprinkle of cinnamon or a dollop of fruit preserves. The possibilities are endless!
  • They’re a Baking Triumph: Creating these Little Buns with Vanilla Pudding is a baking adventure that rewards you with an immense sense of accomplishment. From the moment the dough starts to rise to the final drizzle of vanilla pudding, you’ll be captivated by the magic of baking.
  • They’re the Ultimate Crowd-Pleaser: Whether you’re hosting a dinner party, a family gathering, or simply treating yourself to a well-deserved indulgence, these buns are guaranteed to impress. Their irresistible charm transcends age and preference, making them a universal favorite.

Let’s Gather Our Tools:

Before we embark on this culinary adventure, let’s make sure we have all the necessary equipment at our disposal. Here’s what you’ll need:

  • Measuring cups and spoons (for precision!)
  • A small mixing bowl (for the leaven)
  • A whisk (for mixing magic)
  • Plastic wrap (to keep things fresh)
  • A kitchen mixer with a dough hook (or a large mixing bowl and your strong arms!)
  • A bowl scraper or spatula (to keep things tidy)
  • A rolling pin (to tame the dough)
  • A baking sheet lined with parchment paper (for easy cleanup)
  • A saucepan (for the luscious pudding)

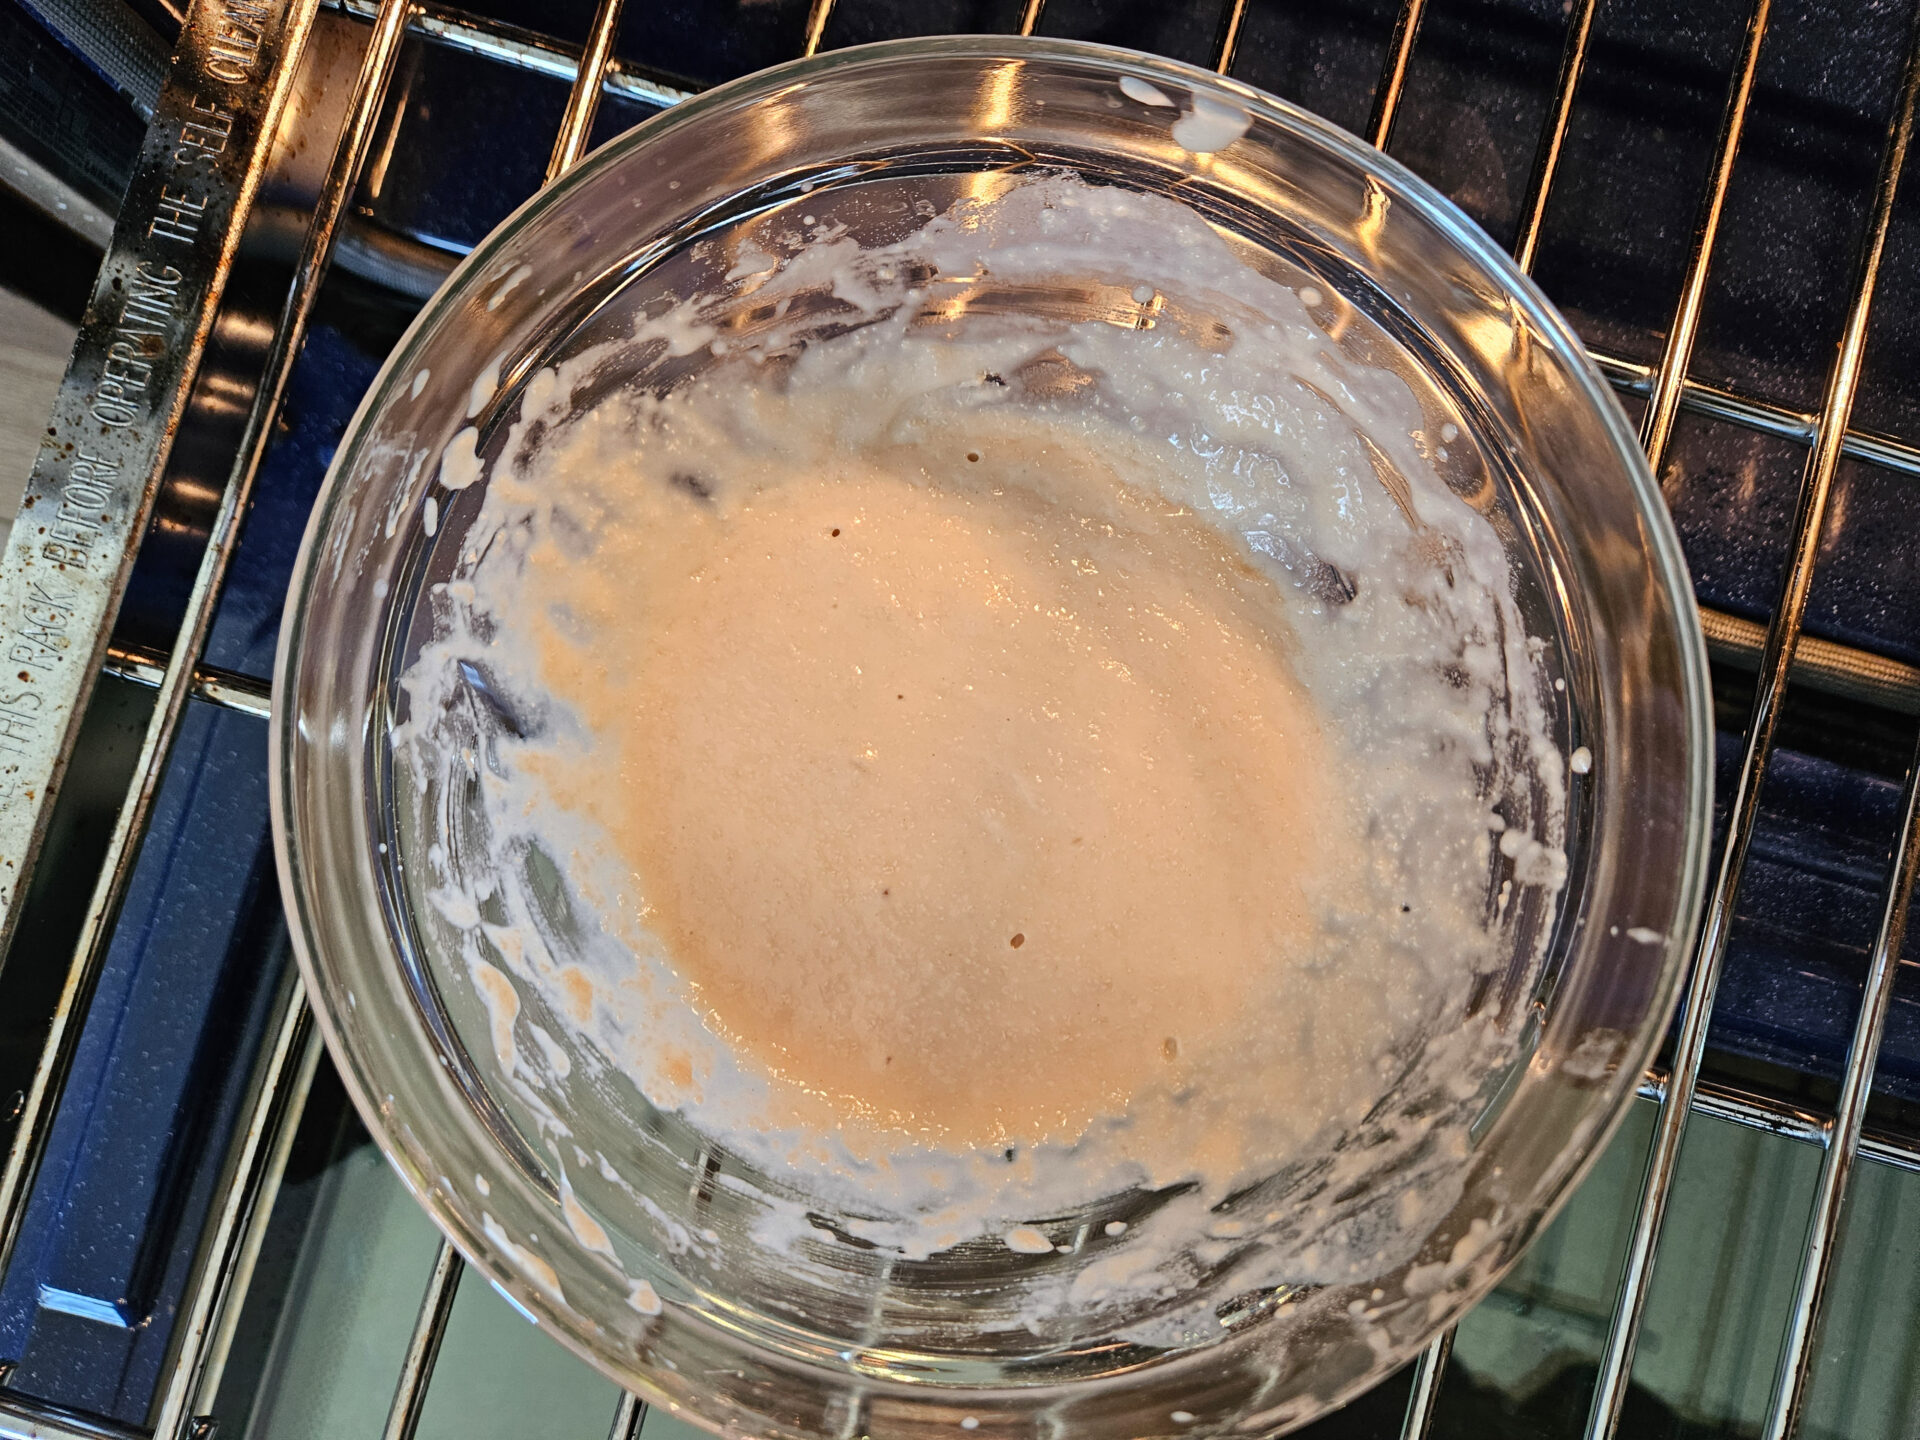
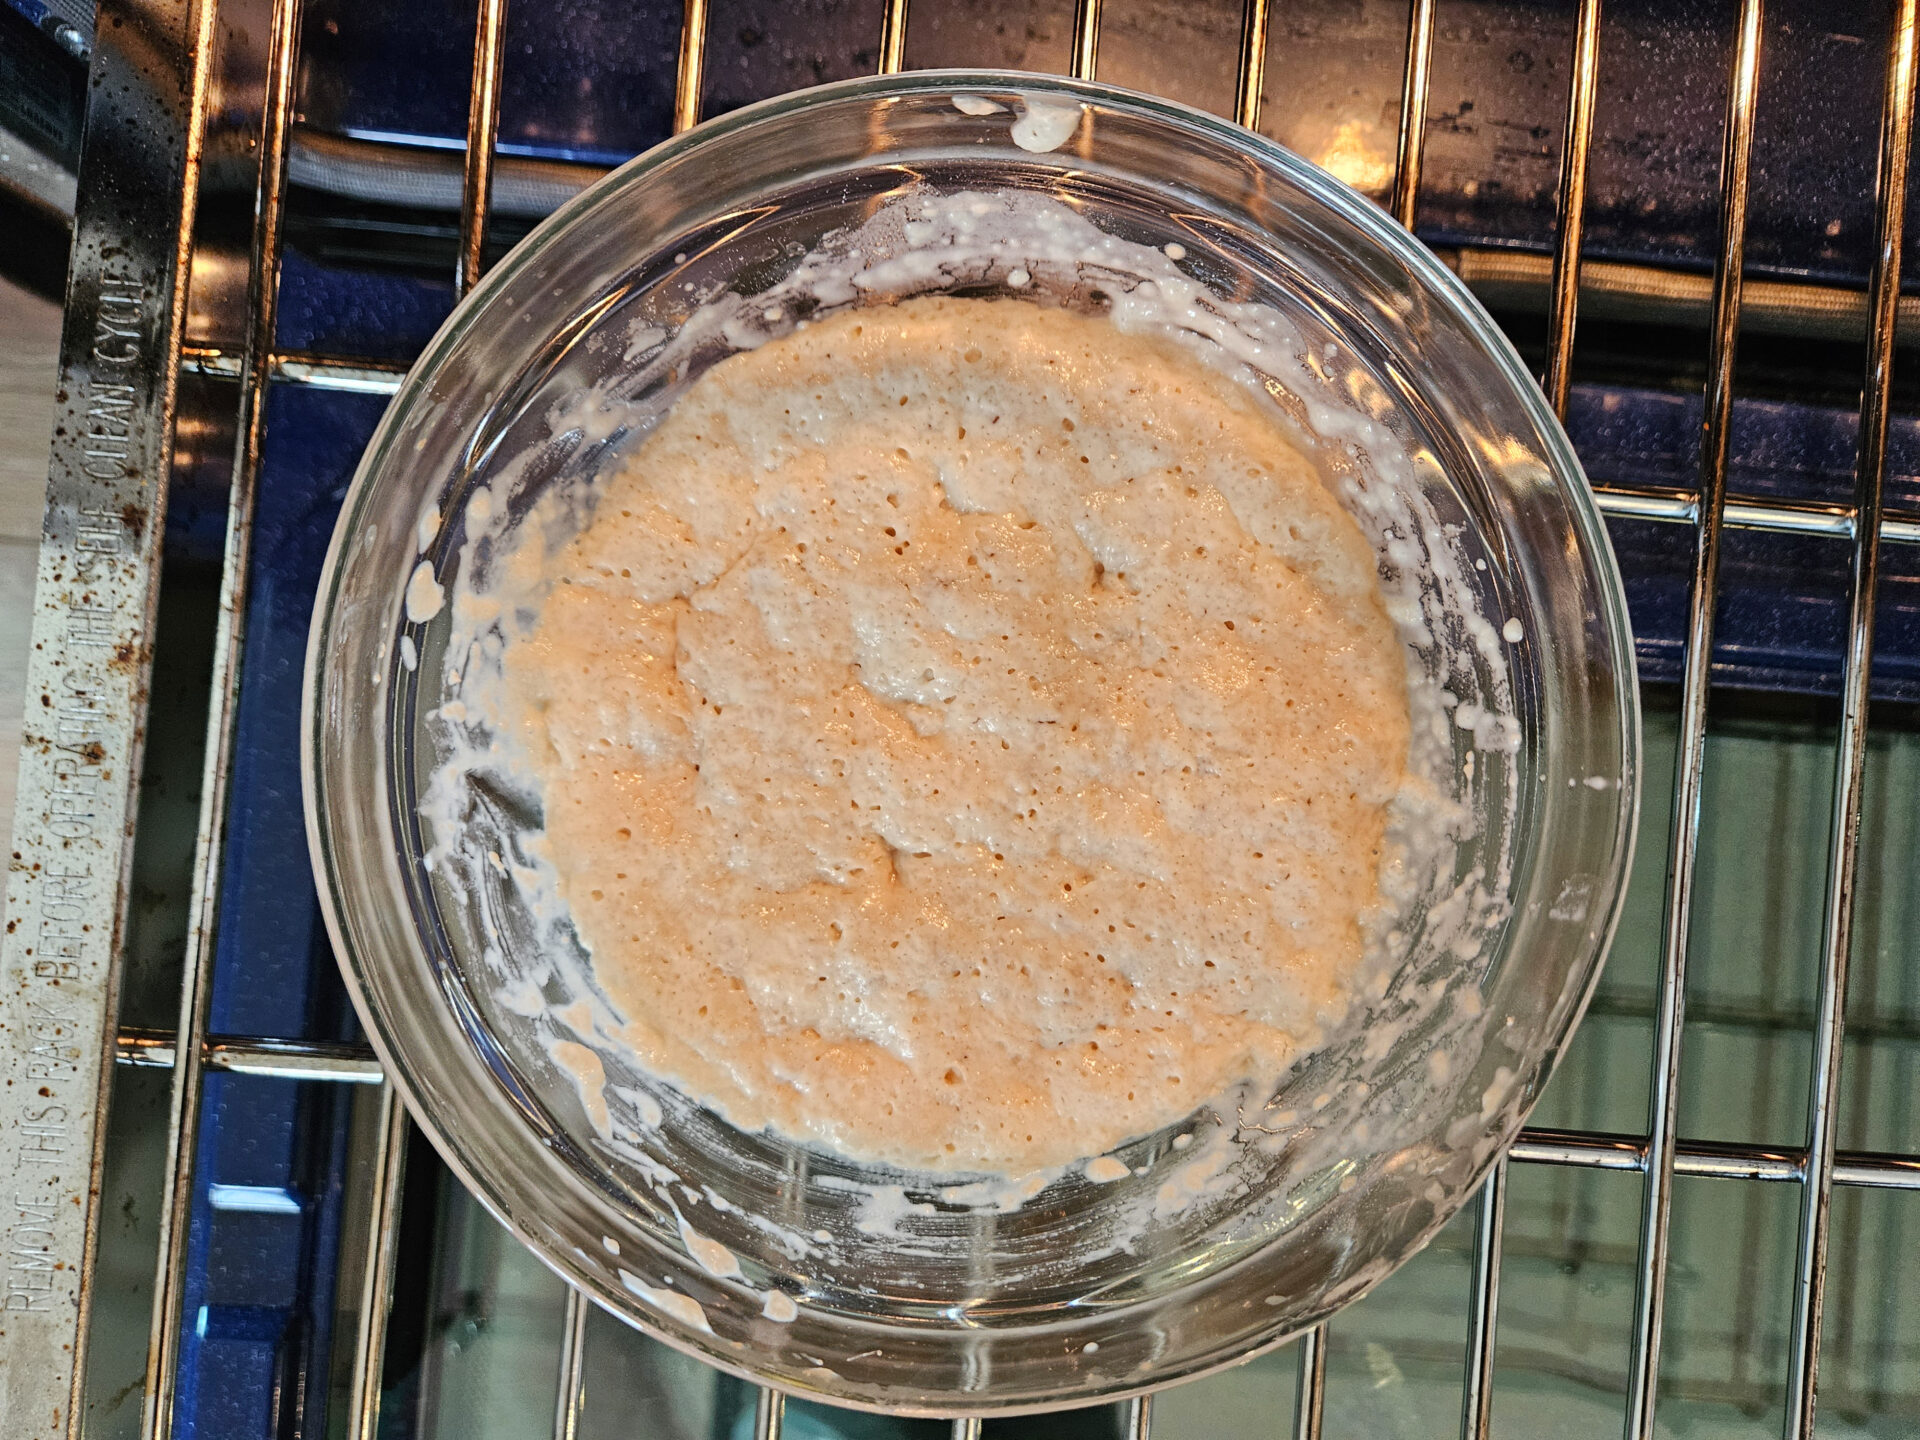
The Journey Begins: Crafting the Leaven:

Our adventure starts with the leaven, the heart and soul of our fluffy buns. In a medium mixing bowl, we’ll combine lukewarm milk, confectioners’ sugar, active dry yeast, and bread flour. A gentle whisk brings these ingredients together, creating a harmonious blend that will soon come to life. We’ll cover the bowl and let it rest in a warm place, allowing the yeast to work its magic and transform the mixture into a bubbly, fragrant starter.

Shaping the Dough:

Now, it’s time to bring in the dough! In our trusty kitchen mixer (or a large bowl if we’re embracing a bit of arm workout), we’ll whisk together an egg and granulated sugar until the mixture is light and frothy. Next, we’ll add softened butter, whisking until it’s fully incorporated and the mixture is smooth and creamy. It’s time to introduce our lively leaven, gently folding it into the batter.

With a dough hook attachment (or our own two hands), we’ll gradually incorporate bread flour, salt, vanilla extract, and lukewarm milk. The dough will transform from a shaggy mass into a smooth, slightly sticky ball. We’ll cover it and let it rise in a warm place, patiently waiting for it to double in size.

Creating the Golden Glaze:

While the dough is enjoying its cozy nap, we’ll prepare a simple yet essential brushing mixture. A quick whisk of an egg and milk creates a golden glaze that will give our buns a beautiful sheen and a touch of richness.

Forming the Buchticky:

Now, for the fun part! We’ll divide our risen dough into manageable portions and roll each one into long, slender ropes. These ropes will be cut into bite-sized pieces, each destined to become a perfect little bun. With gentle hands, we’ll roll each piece into a smooth ball and arrange them on a baking sheet, ensuring they’re close enough to touch but not overcrowded. A light brush of our egg wash mixture adds a touch of shine and prepares them for their time in the oven.

The Final Flourish: Baking and Pudding:

As our little buns undergo their final proof, we’ll turn our attention to the star of the show: the vanilla pudding. In a saucepan, we’ll simmer milk while whisking together the remaining milk, egg yolks, confectioners’ sugar, and flour in a separate bowl. Slowly drizzling the egg yolk mixture into the simmering milk, we’ll whisk continuously until it thickens into a luscious, velvety pudding. A touch of vanilla extract adds the finishing touch.

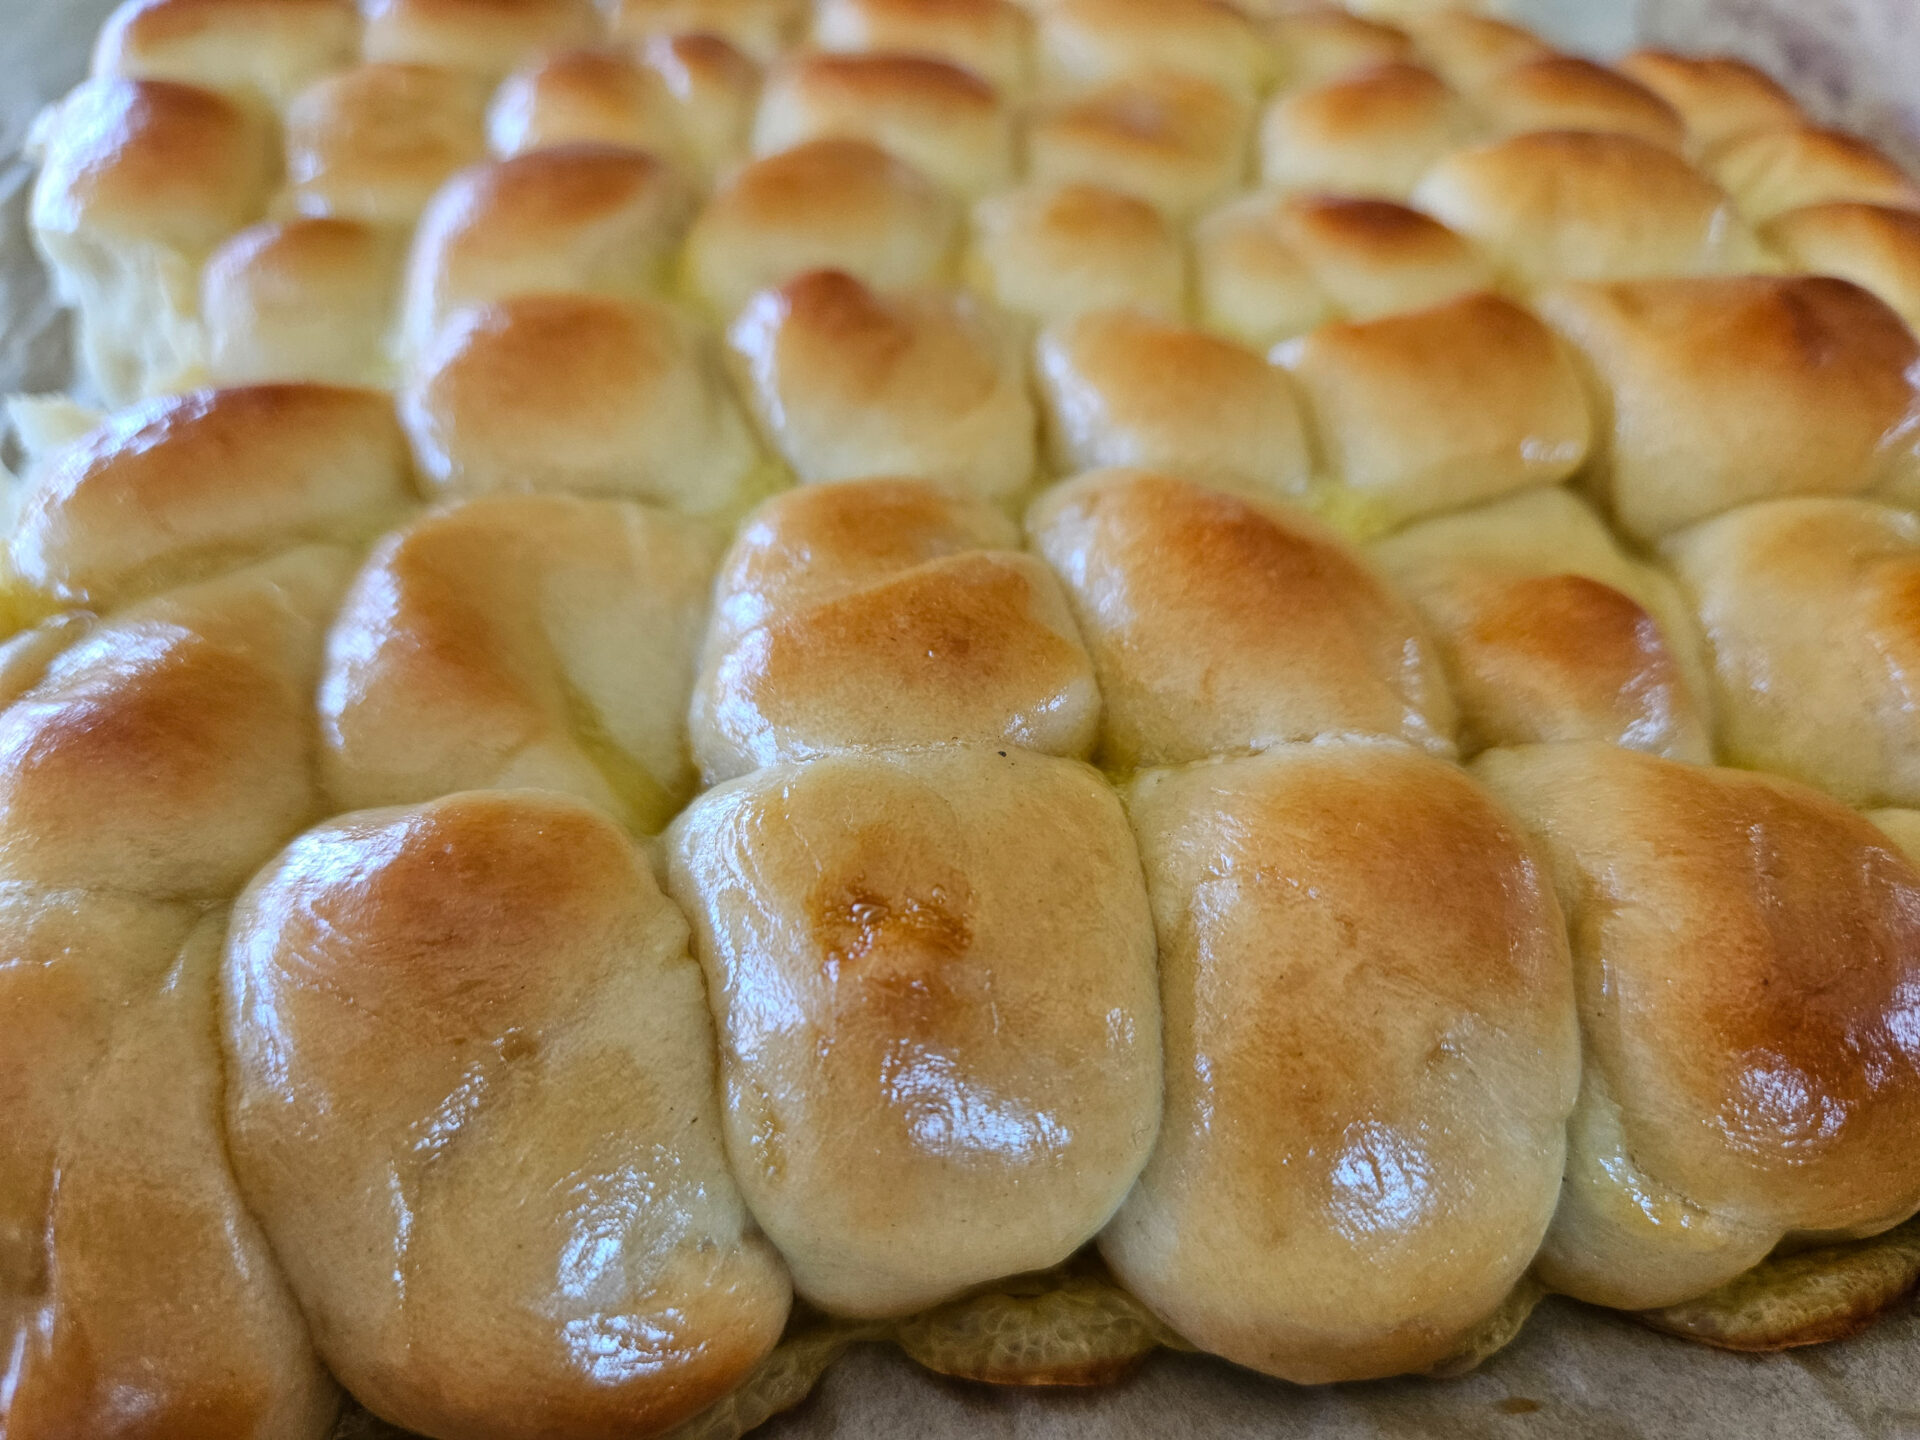
With the oven preheated and the pudding ready, it’s time for the grand finale. We’ll give our buns a final brush of egg wash and slide them into the oven to bake until they emerge golden brown and irresistibly fragrant.

A Feast for the Senses:

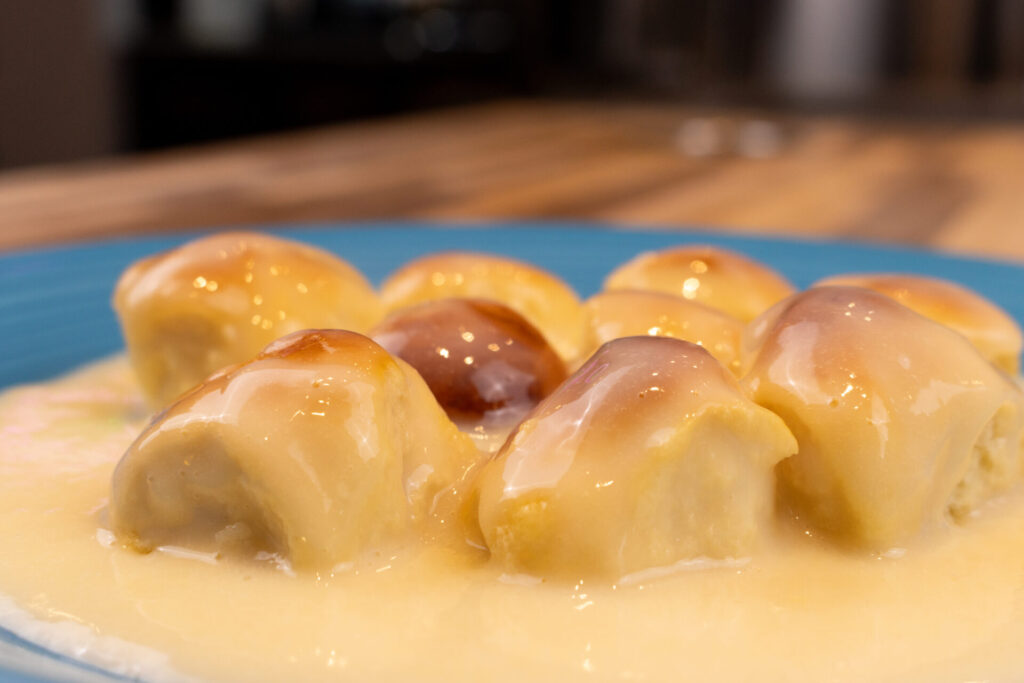
Finally, the moment we’ve all been waiting for! We’ll arrange our warm, freshly baked Little Buns with Vanilla Pudding on plates and generously drench them in that heavenly vanilla pudding. Each bite is an explosion of textures and flavors, a symphony of soft, pillowy buns and creamy, sweet pudding.

Read less
About the Author:
Tom the ChefFounder
# 1
  • Published Recipes: 269
  • Av. Recipe Evaluation:
  • Location: Iowa, USA
  • Member since: 2023-02-02

Disclaimer

  1. General Information Content on this page above, including the content provided on www.CookingHub.com, including all recipes, articles, and other materials, is for general informational purposes only. This content reflects the personal opinions and experiences of its authors and is not intended to provide professional dietary, medical, legal, or political advice. Please consult a qualified professional before making any decisions based on the information presented here.
  2. Content Ownership and Use Content on this page above, including content published on CookingHub.com is owned by the individual authors who created it. Only the authors can access, modify, or delete their content from the platform. Our content may be embedded on third-party websites and blogs without modification. No reimbursement will be provided for this use. If an author removes content from CookingHub.com, it will no longer be available through any embedded links.
  3. Limitation of Liability Neither www.CookingHub.com (operated by the CookingHub Foundation) nor content authors are responsible for any outcome or consequence resulting from the use of information on this site. This includes, but is not limited to:
    • Food Safety: Any health risk related to food handling, food quality, or failure to follow USDA recommendations (including minimum safe cooking temperatures).
    • Preparation Safety: The proper and safe handling of cooking equipment or its suitability for any given task.
    • Recipe Outcomes: The final look, taste, or success of following a recipe.
    • Ingredients and Equipment: The sourcing of ingredients, tools, equipment, or anything else related to the preparation and consumption of food.
    • Nutritional and Dietary Information: The accuracy of nutritional data. This information is provided as a courtesy and should not replace advice from a medical provider. You are responsible for verifying that a diet is suitable for your personal health needs.
    • Errors and Omissions: Any potential errors, typos, or unclear directions in articles and recipes.
  4. User Responsibility All readers, visitors, and users of embedded content are solely responsible for evaluating recipes and articles. You must make your own decisions about whether to follow the steps and recommendations provided. It is your responsibility to ensure that ingredients and preparation methods are safe and appropriate for your personal dietary restrictions and health conditions.