Cook, Learn, and Share to Fight Hunger.
  • 60 min.
  • 120 min.
  • 4/5

Ingredients:

Caramel whipped cream:

Laskonky batter:

Optional chocolate drizzle:

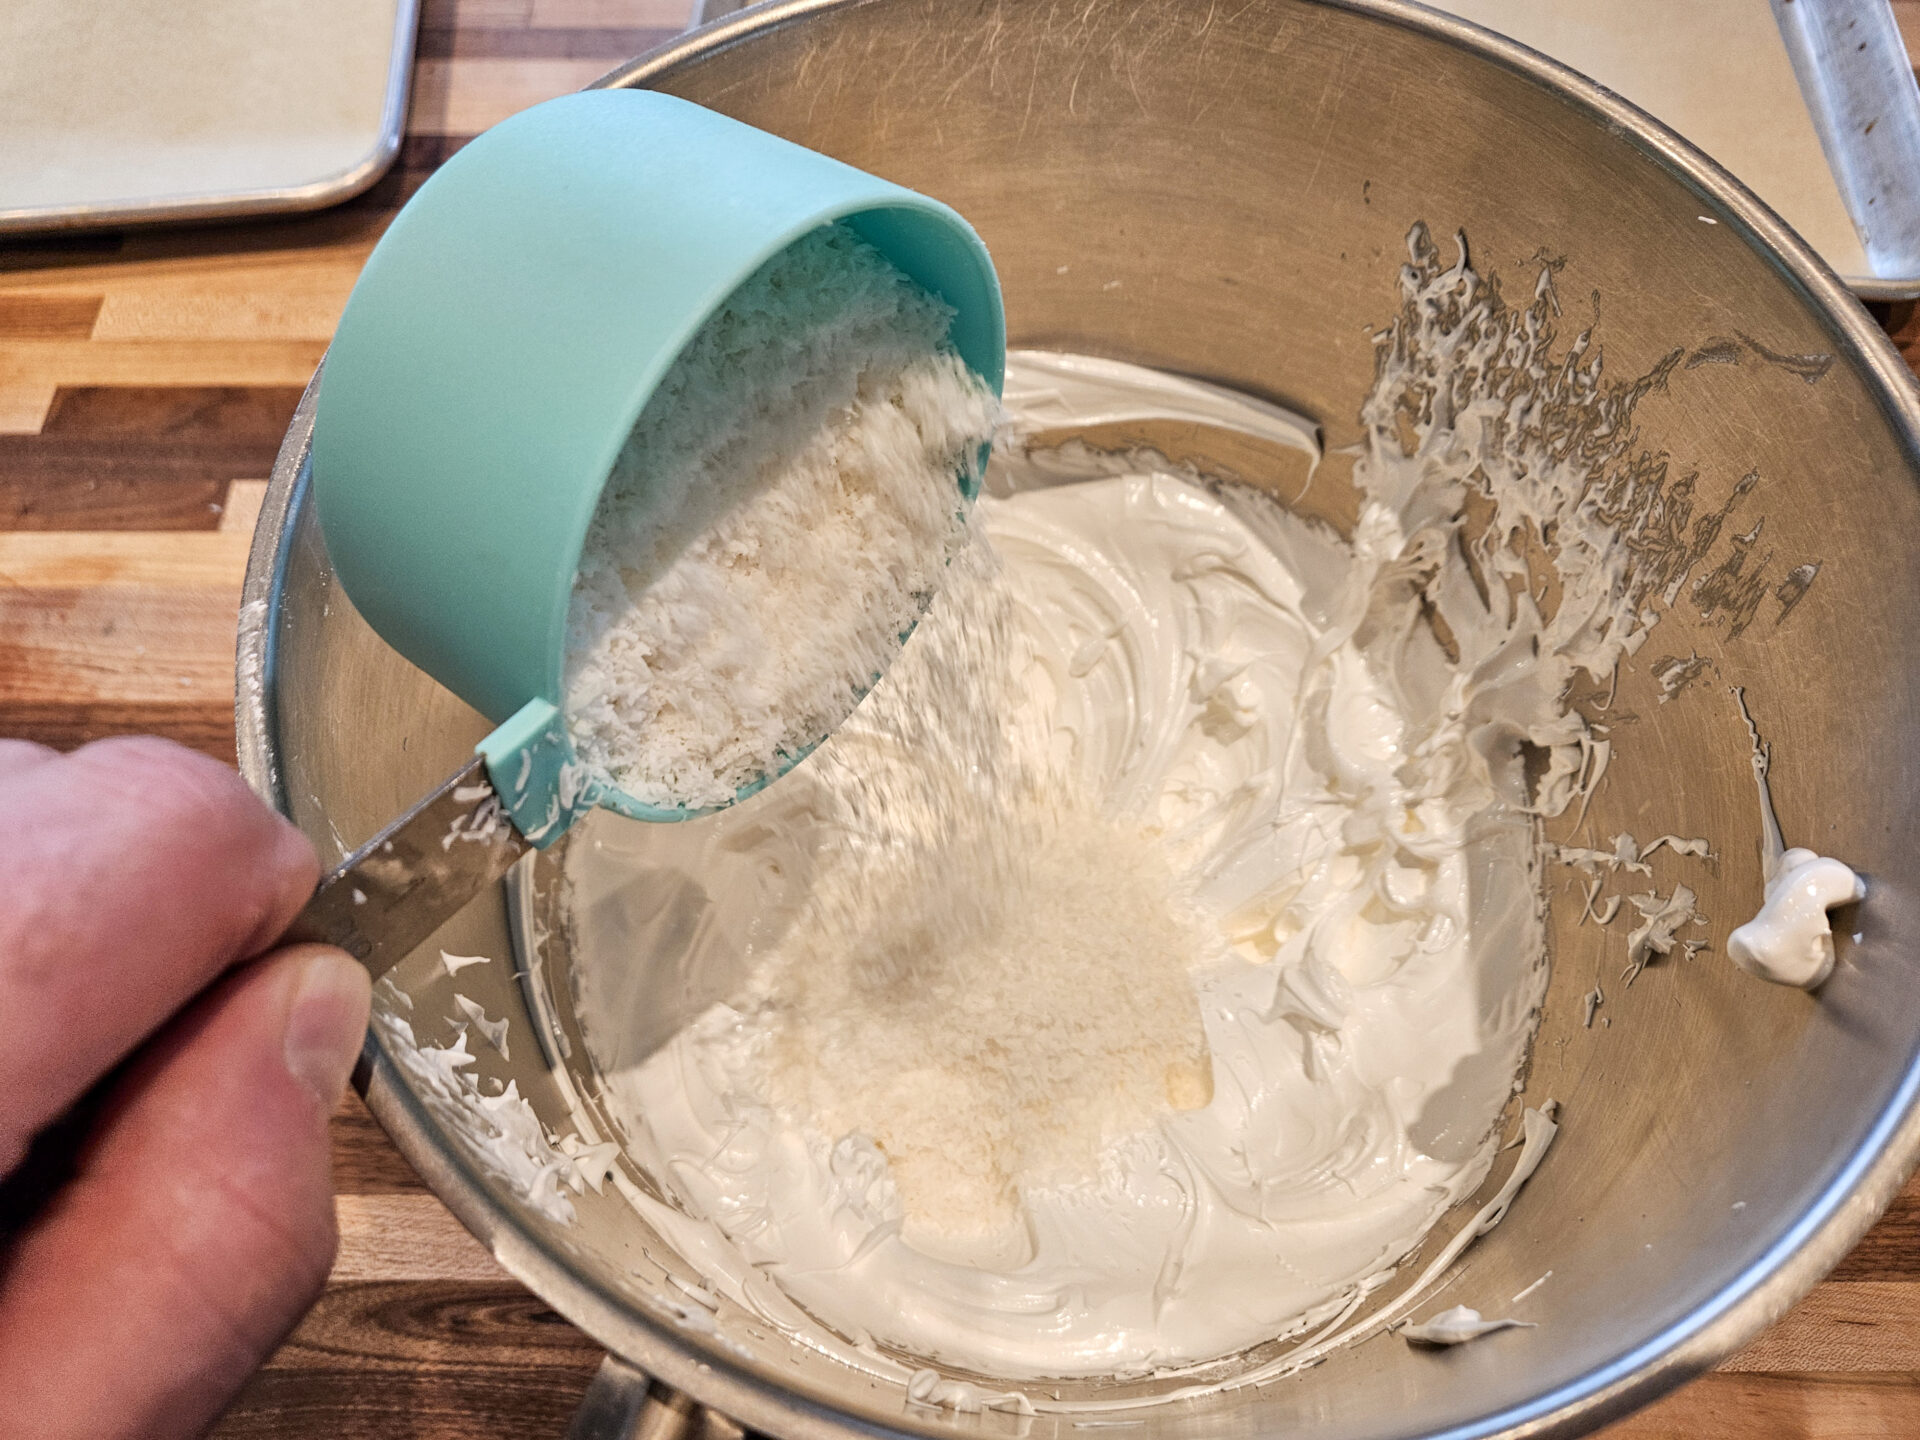
*You can use regular dried grated coconut or fine Macaroon coconut.

Tools:

Directions:

Laskomka mold for mini laskomky. A mold for regular-sized laskomky has the same outer dimensions but has only 6 large openings.

Laskomka mold for mini laskomky. A mold for regular-sized laskomky has the same outer dimensions but has only 6 large openings.

1. Caramel cream – base:

1.1. Place a small saucepan on medium-high heat and add:

1 cup of brown sugar
½ cup of cold water

And briefly stir.

1.2. Cook, stirring occasionally, until the water evaporates and the sugar turns into caramel (about 2 minutes, in some cases longer).

Note:

  • Caramel is typical for its thick consistency, resembling thick caramel syrup.
  • Caramel may start foaming when formed.
Laskomky Preparation-01

1.3.

Remove it from the stove (but leave it in the pot) and let it slightly cool, occasionally stirring with a spatula, for about 1 minute.

1.4.

Meanwhile, place into a measuring pitcher (or glass or ceramic mixing bowl):

1.5.

Thoroughly stir the warm whipping cream into the caramel using a whisk until fully combined.

1.6.

Then, pour the caramel with cream into a mixing bowl and leave it on the countertop to partially cool.

1.7. Then place it into the refrigerator to let it fully cool to be used for later steps.

Tip:
This step can be significantly expedited using a freezer instead of the refrigerator. If you choose to do so, make sure to monitor it to prevent freezing – it only needs to reach a refrigerator temperature, which is about 33 – 40°F.

Important:
Before you use the caramel base in later steps, it must have the same temperature as the fridge in order to perform as expected.

2. Preheat the oven to 250° F (preferably to the convection program if your oven has one).

Notes:

  • If your oven doesn’t support temperatures as low as 250°F, set it to the lowest possible temperature available.
  • If you are not using a convection program, make sure not to bake more than 2 baking sheets at the same time.
Tom the Chef Tom the Chef Founder

How to Separate Eggs

October 19, 2023

Separating eggs isn’t as hard as many people think. Become a master of this important cooking technique with info from my article.

3. Laskonky meringue batter:

3.1. Place into a kitchen mixer bowl:

3 egg whites – room temperature
1 TBSP of confectioners’ sugar (part of the total amount).

Whisk on medium speed to get more air into the egg whites and to make the egg whites foamy (about 2 – 3 minutes).

3.2. Add:

1 ¼ cups of confectioners’ sugar (the rest of the total amount)

Increase the speed to high and whisk until done – medium peaks are formed (about 4 – 10 minutes).

Note:
If your egg whites were taken directly from the fridge (they aren’t room temperature), this step can take 20 minutes or even significantly longer!

Laskomky Preparation-02

3.3. Remove the mixing bowl from the mixer and add:

¾ cup of dried grated coconut

And gently but thoroughly hand stir using a spatula until all are evenly combined.

Laskomky Preparation-03Laskomky Preparation-06

4. Form laskonky:

4.1.

Place laskonky mold on the baking sheet with silicone mat.

4.2.

While holding the mold with one hand (to prevent motion), scoop part of the meringue batter on the top of the mold.

Laskomky Preparation-08

4.3.

Using a offset spatula (or silicone spatula), spread the meringue on top of the mold, paying special attention to ensure that the meringue fills all the compartments.

Laskomky Preparation-09Laskomky Preparation-10

4.4.

Then, using an offset spatula, bowl scraper, or silicone spatula, remove the excess meringue while paying special attention to leaving meringue in the compartments.

4.5. Then, carefully remove the mold by peeling it up.

Notes:

  • This requires a bit of practice, and a gentle shake may help.
  • Don’t worry if the meringue appears slightly distressed on the side or begins to leak slightly – it should fix itself during the baking process.
Laskomky Preparation-11

4.6.

Scrap the excess meringue from the mold and repeat the step with the remaining meringue until you use it all.

Laskomky Preparation-12Laskomky Preparation-13Laskomky Preparation-14

5. Baking & cooling:

5.1. Bake in a preheated oven until fully baked- laskonky holds its shape (usually about 30 min. but no more than 45 min.)

Note:
Rotate the baking sheets in the middle.

5.2.

After baking, let it cool before further manipulation.

6. Caramel cream – finish:

Important:
Make sure that your caramel base and extra cream both reach refrigerator temperature (between 33 – 40°F). If not, return to the refrigerator until the temperature is reached. Failure to do so may result in difficulties whipping the cream.

6.1. Place into a kitchen mixer with a whisk attachment:

¾ cup of cream (remaining amount)

Whisk on a high speed until almost done – the liquid turns almost to a whipped cream (about 2 – 4 minutes).

6.2. Add:

1 TSP of cream of tartar
Cooled caramel whipped cream base (prepared in step 1)

Whisk at high speed until the caramel whipped cream base is fully incorporated and the cream is done –  medium to stiff peaks are formed (usually about 30 seconds to 1 minute, but it may take longer).

6.3. Fill a pastry bag for the next step (you can optionally use a disher or spoon if you do not want to use a pastry bag).

Important:

  • Use the cream soon after preparation because it will start to harden thanks to the cream of tartar.
  • The best is to use an open star tip.

7. Assemble:

Note:
Work one-by-one

7.1. Pipe out a generous amount of caramel cream on one laskonky.

Notes:

  • Try to stay slightly off the edge – the cream will get there when pressed with the other laskonky.
  • After closing (and pressuring the pastry cream with another laskonky), the cream layer should be about ½” or a little more.

7.2.

Cover with another laskonka and gently press.

7.3.

Repeat with all remaining until you use all.

7.4.

Place in the refrigerator to let cool and for the cream to harden (the cream will harden thanks to the cream of tartar).

8. Optional chocolate drizzle:

8.1. Right after you put the laskonky to harden in the refrigerator, start preparing the optional chocolate drizzle by placing it into a small microwaveable mixing bowl:

½ cup of chocolate chips
2 TBSP of butter

Then, place it into the microwave until it partially melts.

8.2. Remove from the microwave and stir with a whisk until all ingredients are fully incorporated.

Note:
If needed, return back to the microwave for a few extra seconds.

8.3.

Then, place the melted chocolate with butter in a small pastry bag.

8.4. Remove the laskonky from the refrigerator (the cream doesn’t need to be fully hardened yet), cut off the tip of the pastry bag, and drizzle it over all the laskonky.

Tip:
The best is to use a motion that crosses all the laskonky to have nice straight lines.

8.5.

Then, place it back in the refrigerator to allow the chocolate to harden.

9. Resting, serving & storing:

9.1.

For the best results, let it cool in the refrigerator until the cream fully hardens, which usually takes about one hour, but the best results come if refrigerated overnight.

9.2.

Best served with coffee or hot cocoa – remove from the refrigerator right before serving.

9.3.

Store in the refrigerator for up to 1 week.

Laskomky Czech Macaroons-09
About the Author:
Tom the ChefFounder
# 1
  • Published Recipes: 269
  • Av. Recipe Evaluation:
  • Location: Iowa, USA
  • Member since: 2023-02-02

Disclaimer

  1. General Information Content on this page above, including the content provided on www.CookingHub.com, including all recipes, articles, and other materials, is for general informational purposes only. This content reflects the personal opinions and experiences of its authors and is not intended to provide professional dietary, medical, legal, or political advice. Please consult a qualified professional before making any decisions based on the information presented here.
  2. Content Ownership and Use Content on this page above, including content published on CookingHub.com is owned by the individual authors who created it. Only the authors can access, modify, or delete their content from the platform. Our content may be embedded on third-party websites and blogs without modification. No reimbursement will be provided for this use. If an author removes content from CookingHub.com, it will no longer be available through any embedded links.
  3. Limitation of Liability Neither www.CookingHub.com (operated by the CookingHub Foundation) nor content authors are responsible for any outcome or consequence resulting from the use of information on this site. This includes, but is not limited to:
    • Food Safety: Any health risk related to food handling, food quality, or failure to follow USDA recommendations (including minimum safe cooking temperatures).
    • Preparation Safety: The proper and safe handling of cooking equipment or its suitability for any given task.
    • Recipe Outcomes: The final look, taste, or success of following a recipe.
    • Ingredients and Equipment: The sourcing of ingredients, tools, equipment, or anything else related to the preparation and consumption of food.
    • Nutritional and Dietary Information: The accuracy of nutritional data. This information is provided as a courtesy and should not replace advice from a medical provider. You are responsible for verifying that a diet is suitable for your personal health needs.
    • Errors and Omissions: Any potential errors, typos, or unclear directions in articles and recipes.
  4. User Responsibility All readers, visitors, and users of embedded content are solely responsible for evaluating recipes and articles. You must make your own decisions about whether to follow the steps and recommendations provided. It is your responsibility to ensure that ingredients and preparation methods are safe and appropriate for your personal dietary restrictions and health conditions.