Ah, the humble gingersnap. A cookie jar staple, a holiday favorite, a comforting reminder of grandma’s kitchen. But let’s be real, sometimes those store-bought gingersnaps (and even some homemade ones!) are a bit…lacking. Where’s the ginger? Where’s the snap? Where’s the flavor explosion that sends your taste buds on a joyful, spicy adventure?
Fear not, fellow ginger enthusiasts, because we’re about to embark on a culinary journey that will redefine your gingersnap experience. Today, we’re not just making cookies; we’re crafting edible masterpieces, each bite a symphony of flavor and texture. And our guide on this delicious quest? None other than Tom, the passionate founder of CookingHub, and his meticulously crafted gingersnap recipe.
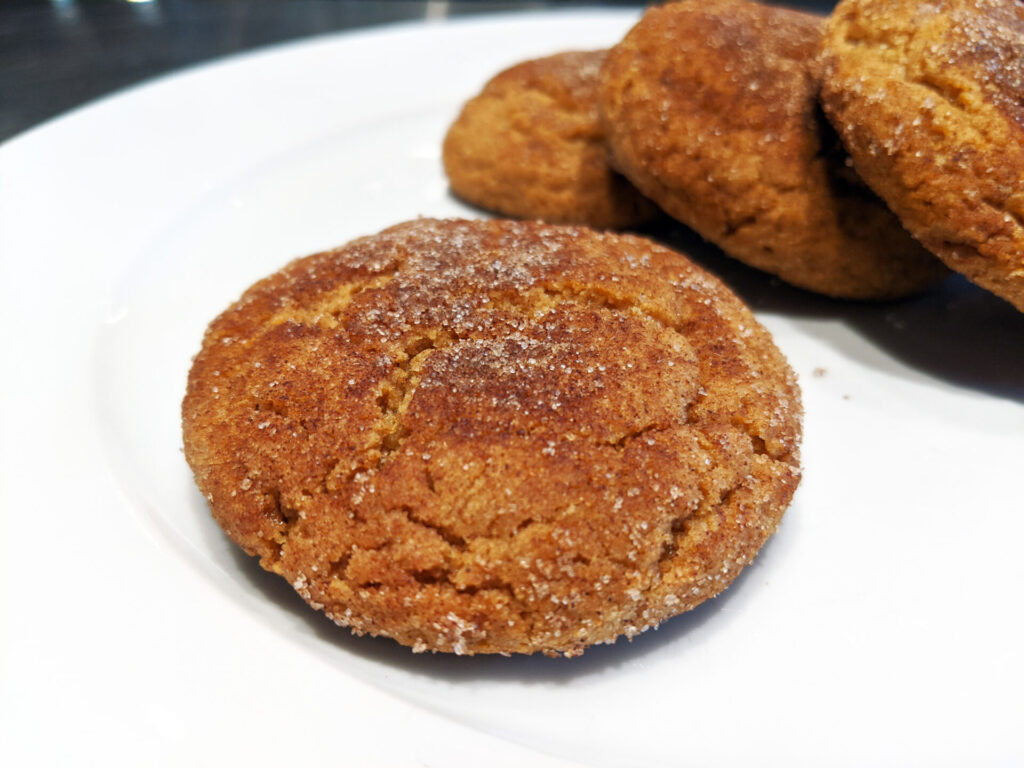
Tom’s Gingersnap Cookies: A Cut Above the Rest
Tom, a self-proclaimed ginger aficionado, understands the frustration of biting into a “gingersnap” that tastes more like a cinnamon snooze-fest. That’s why he’s developed a recipe that puts ginger front and center, where it belongs. He’s not playing around with subtle hints of spice; we’re talking a full-on ginger extravaganza!
What sets Tom’s recipe apart? It’s all about the double ginger whammy. Not only does the dough itself boast a generous amount of ground ginger, but he’s also taken the extra step of adding it to the coating mixture. This ingenious move ensures that every nook and cranny of these cookies is infused with that warm, spicy goodness.
Preparing for Gingersnap Glory: Gathering Your Arsenal
Before we unleash our inner baking wizards, let’s make sure we have everything we need. Think of it as assembling your culinary arsenal for a mission of deliciousness. You’ll need your trusty measuring cups and spoons, of course, and a reliable mixer to do the heavy lifting. A couple of baking sheets are a must, and don’t forget the parchment paper – our cookies deserve a proper throne!
And now for a secret weapon: the disher. This often-overlooked tool is the key to perfectly uniform cookies. No more wonky shapes or uneven baking; the disher ensures that each cookie is a masterpiece of consistency.
The Dough: Where the Magic Begins
Our journey starts with the foundation of any great cookie: the dough. We begin by creaming together butter and sugar, transforming them into a light and airy cloud of sweetness. Then, we introduce the eggs, binding the ingredients together and adding richness. A generous pour of molasses brings that signature gingersnap depth and chewiness.
And now, for the moment we’ve all been waiting for: the ginger! We’re not holding back here, folks. A full 5 teaspoons of ground ginger go into this dough, ensuring a flavor that’s bold and unmistakable. A touch of cinnamon adds warmth, while baking powder provides the lift and salt enhances all the other flavors. Finally, we incorporate the flour, bringing everything together into a smooth, pliable dough.
The Ginger Power Coating: A Secret Weapon
Now, let’s talk about the secret weapon that elevates these gingersnaps to legendary status: the coating. This simple yet powerful mixture of sugar, ginger (yes, more ginger!), and cinnamon is what gives these cookies their irresistible crackle and an extra layer of spicy goodness.
Shaping and Baking: The Transformation
With our dough and coating ready, it’s time to bring these gingersnaps to life. Preheat your oven to 350°F and line those baking sheets with parchment paper. Now, grab your disher and start scooping! Each perfectly portioned scoop of dough gets a luxurious bath in the ginger coating, ensuring maximum flavor infusion.
Place the coated dough balls on your baking sheets, leaving some space between them to allow for spreading. And here’s a pro tip from Tom himself: resist the urge to flatten the scoops! These cookies know what they’re doing; they’ll spread naturally in the oven, creating that perfect gingersnap texture. Sprinkle any remaining coating mixture over the tops of the cookies for an extra touch of magic.
Slide those baking sheets into the oven and let the transformation begin. Bake for 12-15 minutes, rotating the sheets halfway through to ensure even baking. Keep a close eye on them; you want the cookies to be golden brown and slightly firm to the touch.
The Final Act: Cooling and Savoring
Once your kitchen is filled with the intoxicating aroma of ginger and cinnamon, it’s time to remove those baking sheets from the oven. But hold on! Don’t be tempted to dig in just yet. Let the cookies cool completely on the baking sheets. This is a crucial step, as they’ll continue to firm up as they cool, developing that signature snap.
And then? Well, then it’s time to reward yourself for your baking prowess. Brew a pot of tea, pour a glass of milk, or grab whatever your favorite cookie-dunking beverage may be. Take a bite, close your eyes, and let the symphony of flavors transport you to a place of pure ginger bliss.
Tom’s parting wisdom:
- If you notice any ingredients clinging to the sides of your mixer bowl, don’t panic! Just stop the mixer and use a spatula to guide them back into the fold.
- Remember, these cookies will be softer than expected straight out of the oven. But fear not, they’ll harden up as they cool, transforming into the perfect snappy treats.
So there you have it, a comprehensive guide to creating gingersnaps that will redefine your expectations. With Tom’s expert guidance and a little bit of baking magic, you’ll be churning out batches of these gingery delights in no time. Happy baking!
Read less

Comments