Cook, Learn, and Share to Fight Hunger.
  • 30 min.
  • 3 h 30m
  • 2/5

Ingredients:

Fries:

Final touch:

*Optionally, you can substitute it with any other kind of potato. Preferably use potatoes right after purchasing or soon after so they will have less sugar. While storing potatoes, the sugar naturally increases, and frying more sugary potatoes increases the risk of cancer.

Recipes

Best served with:

Directions:

1. Fries preparation:

1.1.

Briefly rinse potatoes under cold water.

1.2.

Cut off the ends of the potatoes (about ¾ inch) and peel (or leave the skin on if you are looking for a more rustic look).

1.3.

Cut potatoes into fries and try to reach an even thickness (for a more even fry).

A.

Thin fries with a thickness of about ¼” will be crispy all the way through.

B.

Regular fries with a thickness of about 3/8″ will be crispy and have a little bit of a creamy part in the middle.

C.

Steak fries with a thickness of ½” or more will have a crispy outside and a decent amount of creaminess inside.

1.4.

Place cut fries into a medium bowl with cold water, cover with plastic wrap, and let rest in the refrigerator at least 3 hours, preferably overnight (to reduce the starch and reach perfect results).

Important:

  • The key to crispy fries is a two-step frying process.
  • For each step, make it in batches to prevent an unwanted decrease in the oil’s temperature. The number of batches depends on the size of your deep fryer or pot. Splitting into 2 batches should be adequate for a large or medium fryer, 3 – 4 for a small fryer.

Deep Frying

October 17, 2023

Deep frying is a very popular cooking method. Unfortunately, it is also considered unhealthy since deep fried food represents higher calorie intake when compared to non-fried food. With frequent consumption it can lead to unwanted weight gain. Even though deep frying sounds for some people almost scary, it is simply submerging food in hot oil which leads to instantly cooking the surface while moisture is trapped in the food and keeps cooking the food from the inside.

Chef Tom Chef Tom Founder

2. 1st Deep Frying:

2.1.

Drain the water from your fries and dry them on a kitchen towel. Then let them dry on another dry kitchen towel while proceeding with the next step.

2.2.

Preheat oil to 300°F.

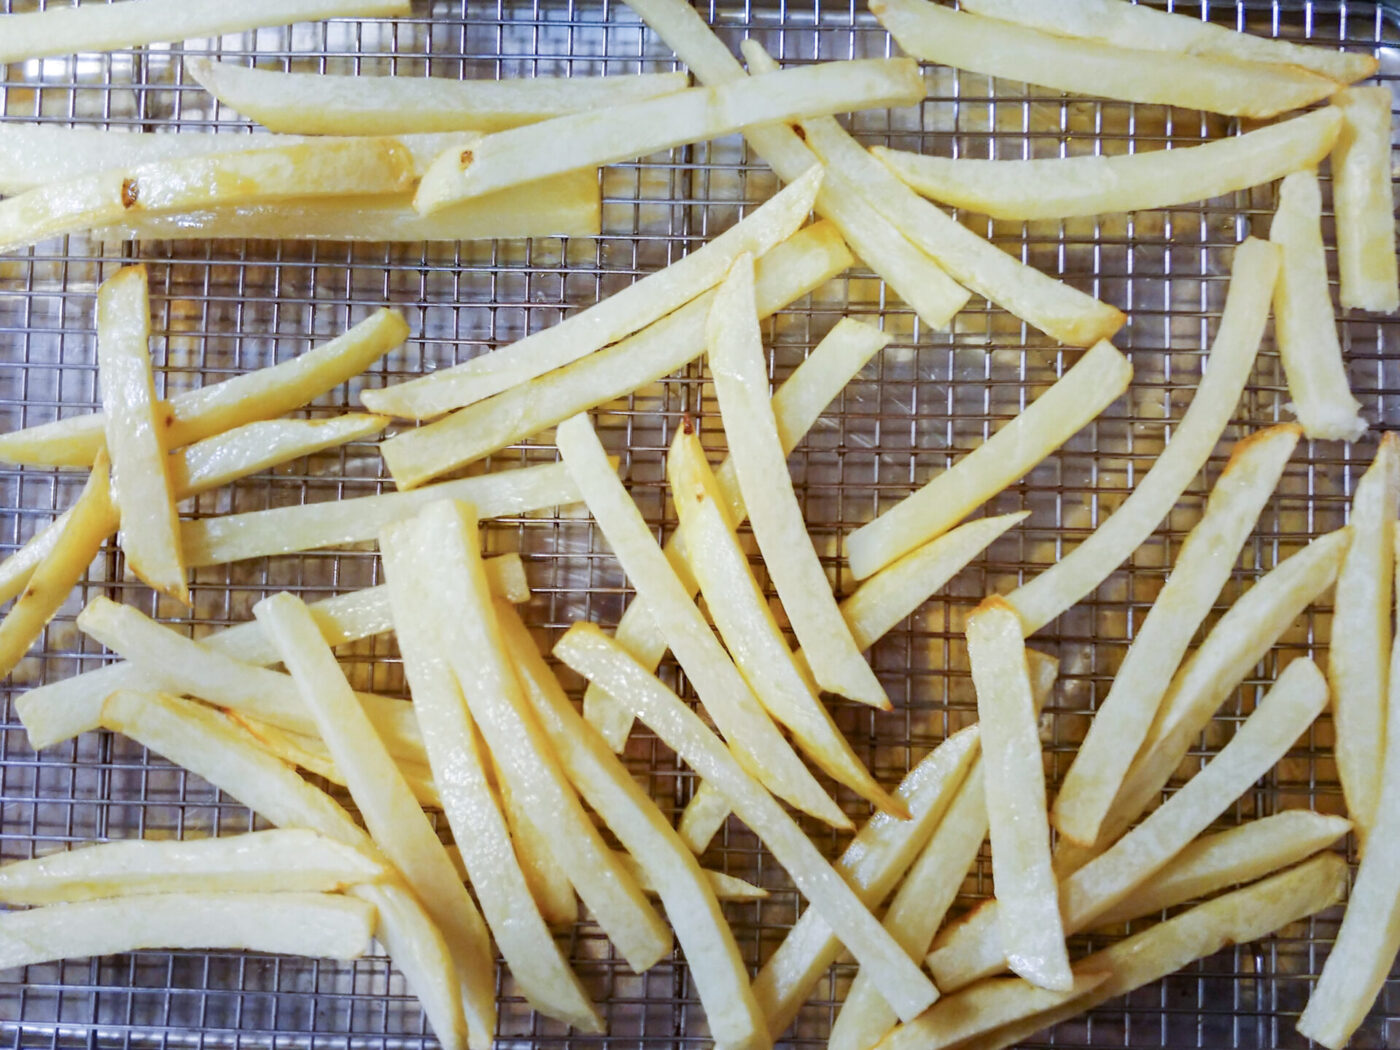
2.3. Then fry the fries until they are close to being cooked (they look almost edible but still a little pale):

  • about 2 minutes for thin fries
  • 2 – 3 minutes for regular fries
  • 4 or more minutes for steak fries

Tip:
To ensure this step is complete, remove one fry and cut it with a knife. If the knife goes through easily – like through cooked potatoes, you can remove the fries from the cooling rack to rest (for at least 10 minutes at room temperature).

French Fries-1

3. 2nd Deep Frying:

3.1.

Increase the oil temperature to 370°F.

3.2.

When the temperature is reached, carefully place fries into the frier (be extra careful now as they are more fragile than before the first step).

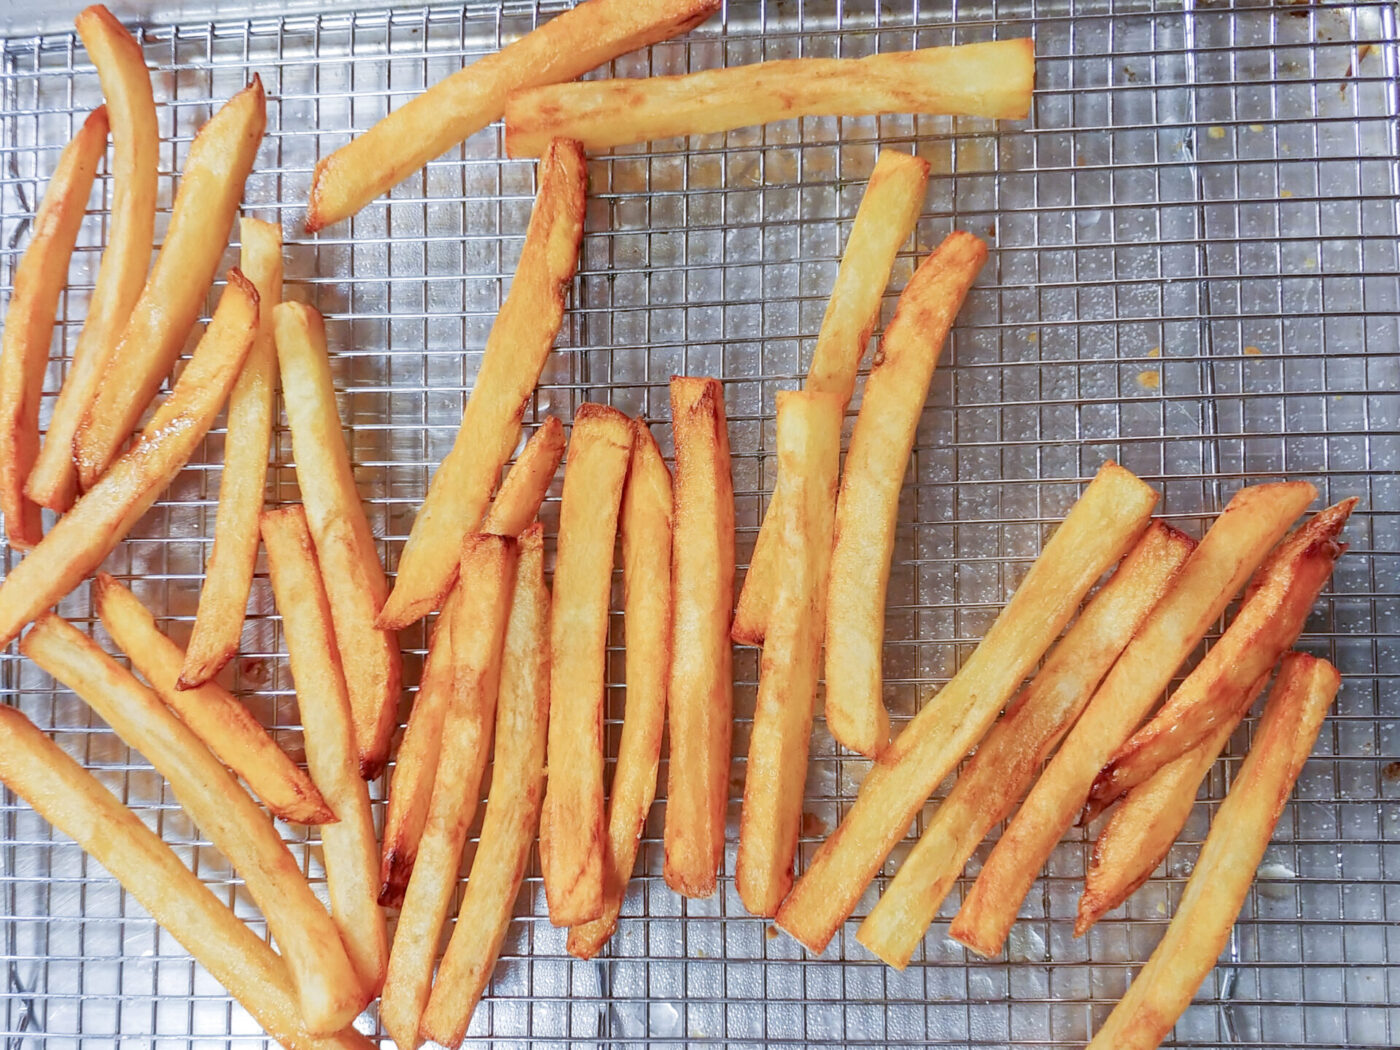
3.3. Fry until a golden color is reached:

  • 1 – 3 minutes for thin
  • 2 – 4 minutes for regular fries
  • 3 or more minutes for steak fries
French Fries-2

3.4.

Place fries on a cooling rack or paper towel for one minute to reduce excessive fat.

4. Serving:

4.1.

Then place them into a large bowl, generously salt and pepper, and thoroughly (but gently) mix together (preferably by shaking the bowl).

4.2.

Taste and add more salt and pepper if needed.

The Epic Saga of the French Fry: A Deep-Fried Odyssey Through Time and Taste

Read more

Prepare to embark on a culinary adventure of epic proportions, a journey that delves deep into the sizzling history and tantalizing techniques behind the world’s most beloved fried food: the French fry. We’ll traverse continents, uncover ancient secrets, and master the art of transforming humble potatoes into golden, crispy works of art.

Unearthing the Ancient Roots of the Fry: A Tale as Old as Time

While the precise origins of the French fry remain shrouded in mystery, their story is intertwined with the very history of the potato itself. Imagine, if you will, the Andes Mountains of South America, thousands of years ago. The Inca civilization, masters of agriculture, cultivated a variety of potatoes in the harsh mountain environment. These early potatoes, far from the starchy spuds we know today, were small and bitter, requiring ingenuity to make them palatable.

Some historians believe that the Incas were among the first to fry potatoes, perhaps as early as the 10th century. They developed a method known as “chuño,” a freeze-drying technique that removed moisture from the potatoes, making them lighter and easier to fry. These early fried potatoes were likely a far cry from the crispy fries we enjoy today, but they represent the first chapter in the long and storied history of the fry.

From Andes to Europe: A Transatlantic Voyage

Fast forward to the 16th century, when Spanish conquistadors arrived in South America, hungry for gold and glory. Among their many discoveries was the humble potato, which they brought back to Europe as a curiosity. Initially met with skepticism, the potato gradually gained acceptance as a reliable and inexpensive food source.

But it was in Belgium, not Spain, that the potato truly began its transformation into the fry we know and love. Legend has it that in the 17th century, villagers in the Meuse Valley, faced with a frozen river and a shortage of fish, turned to potatoes as a substitute. They cut the potatoes into fish-like shapes and fried them in animal fat, creating a crispy, satisfying treat.

The French Connection: A Misnomer with a Twist

Despite their name, “French fries” may not be truly French at all. While fried potatoes were certainly enjoyed in France, it was during World War I that the term “French fries” likely emerged. American soldiers stationed in Belgium encountered these fried potatoes and, hearing the local language (French), dubbed them “French fries.” The name stuck, and the rest, as they say, is history.

The Science of the Perfect Fry: A Two-Step Symphony of Crispness

Today, French fries are a global culinary icon, enjoyed in countless variations around the world. But achieving that perfect balance of crispiness and flavor requires a deep understanding of the science behind the fry. Our recipe, a culmination of culinary wisdom and experimentation, utilizes a two-step frying process that unlocks the secrets of potato perfection.

Step 1: Preparing the Potatoes

  • Potato Selection: While our recipe recommends russet potatoes for their high starch content and fluffy interior, the world of potatoes is vast and varied. Feel free to explore other options, from the buttery Yukon Gold to the vibrant purple Peruvian. Just remember, freshness is key! As potatoes age, their sugar content increases, leading to undesirable browning and potential health concerns when fried.
  • The Art of the Cut: The size and shape of your fries play a crucial role in their final texture. Thin fries offer maximum surface area for crispiness, while thicker cuts provide a delightful contrast between a crunchy exterior and a soft, fluffy center. Aim for uniform thickness to ensure even cooking.
  • The Cold Embrace: Once your potatoes are cut, submerge them in a bath of cold water and refrigerate for at least 3 hours, or preferably overnight. This crucial step helps to wash away excess starch, which can hinder crispiness and create a gummy texture.

Step 2: The First Fry: A Gentle Awakening

  • Dry and Conquer: Before introducing your potatoes to the hot oil, ensure they are thoroughly dry. Excess moisture can cause the oil to splatter and may prevent the potatoes from cooking evenly.
  • Low and Slow: Preheat your oil to 300°F, a gentle temperature that allows the potatoes to cook through without burning.
  • Batch by Batch: Fry your potatoes in batches, ensuring that the oil temperature remains consistent and the fries have ample space to cook evenly.
  • The Doneness Test: After the first fry, your potatoes should be pale and almost fully cooked. A knife should easily pierce through a test fry, encountering minimal resistance.
  • Rest and Recharge: Allow the fries to rest on a cooling rack for at least 10 minutes. This allows steam to escape, preventing the fries from becoming soggy.

Step 3: The Second Fry: The Golden Transformation

  • Turn Up the Heat: Increase the oil temperature to 370°F. This higher temperature will create that coveted golden crust, a symphony of crispness that delights the senses.
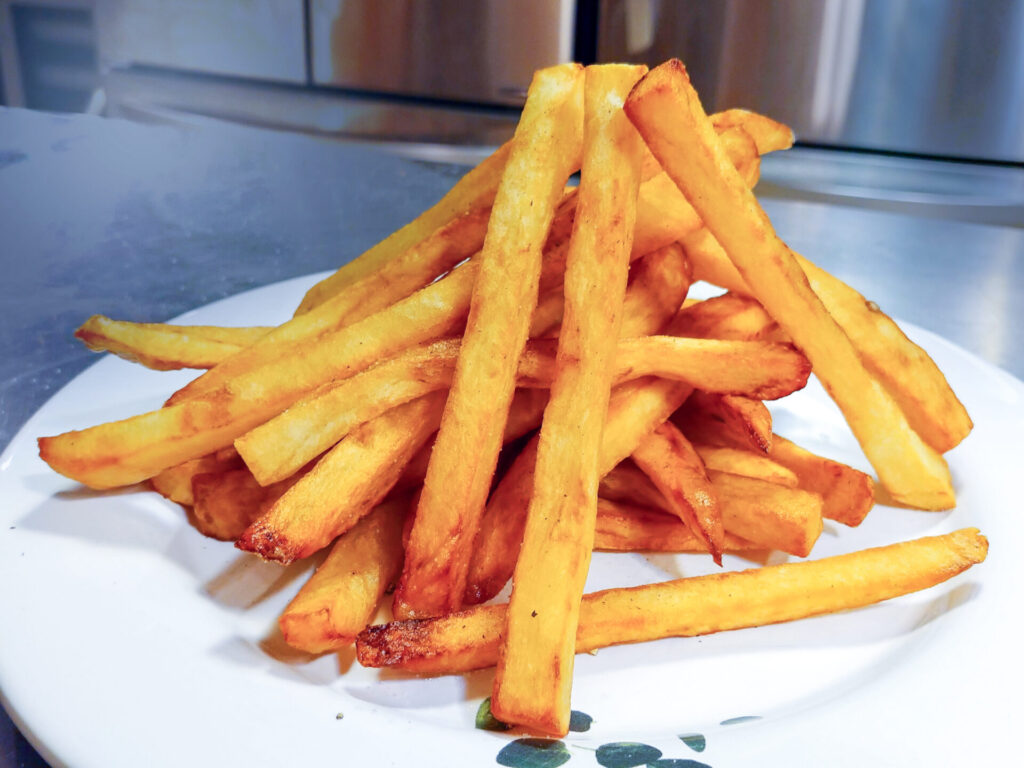
  • Golden Perfection: Fry the potatoes again, keeping a watchful eye on their transformation. They should achieve a beautiful golden color, a testament to your culinary prowess.
  • Defeat the Grease: Remove the fries from the oil and place them on a cooling rack or paper towels to drain any excess oil.

Step 4: Season and Savor

  • Seasoning Symphony: Toss your fries with a generous amount of salt and pepper, or explore a world of flavors with your favorite seasonings.
  • Serve with Gusto: Enjoy your crispy, golden fries while they’re hot! Pair them with your favorite dipping sauces, burgers, or simply savor them on their own as a testament to your culinary mastery.

Beyond the Basics: Mastering the Art of the Fry

  • Oil Selection: Choose an oil with a high smoke point, such as peanut oil or canola oil, to prevent burning and off-flavors.
  • Temperature Control: A deep-fry thermometer is an essential tool for maintaining the correct oil temperature throughout the frying process.
  • Safety First: Never leave hot oil unattended. Exercise caution when adding and removing fries from the fryer to avoid burns.
  • Embrace Experimentation: Don’t be afraid to experiment with different potato varieties, seasonings, and dipping sauces to create your own signature fry.

With a little practice, patience, and a dash of culinary curiosity, you can transform ordinary potatoes into extraordinary culinary creations. So grab your potatoes, fire up your fryer, and embark on your own deep-fried odyssey, a journey that will elevate your fry game to legendary status.

Read less
About the Author:
Chef TomFounder
# 1
  • Published Recipes: 240
  • Av. Recipe Evaluation:
  • Location: Iowa, USA
  • Member since: 2023-02-02

Add My Review

If you want to add your review, you must log in.

Disclaimer

All content and information (including recipes, articles, and other materials) on CookingHub.com are the opinions of the authors and are not intended to provide dietary, medical, legal, or political advice. Consult with a professional before deciding to follow these opinions.

Authors and www.CookingHub.com (operated by CookingHub Foundation) are not responsible for any part of any possible outcome or its consequences, which include (but are not limited to):

  • Any health risk related to the handling of food, food quality, and/or not following USDA recommendations (including minimum safe serving temperatures and other guidelines).
  • Safety during preparation, including the handling of equipment and the equipment’s suitability for food preparation.
  • Improper performance of cooking techniques.
  • Sourcing of ingredients, providing tools, equipment, and anything else related to the preparation and consumption of the products of this recipe.
  • Nutritional data and information and diet-related information (and their accuracy). It is important to consult with your medical provider to ensure that the diet you are considering is suitable for you and to verify the information provided before proceeding.
  • The overall outcome of following recipes, including the look and taste of the final product.
  • Possible errors in articles and recipes (including incorrectly or unclearly explained steps and directions).
  • Typos.

All readers (users and visitors of www.CookingHub.com) are responsible for evaluating the recipes and articles and making their own decisions about whether to follow the steps and recommendations. They must ensure that the ingredients and steps fit with their dietary restrictions and avoid preparation methods that could pose a health risk due to an unsuitable diet.